
Affiliate Disclosure: Some of the links in this post are affiliate links. This means we may earn a small commission if you make a purchase through these links—at no extra cost to you. We only recommend products and tools that we genuinely believe will help you with your woodworking projects.
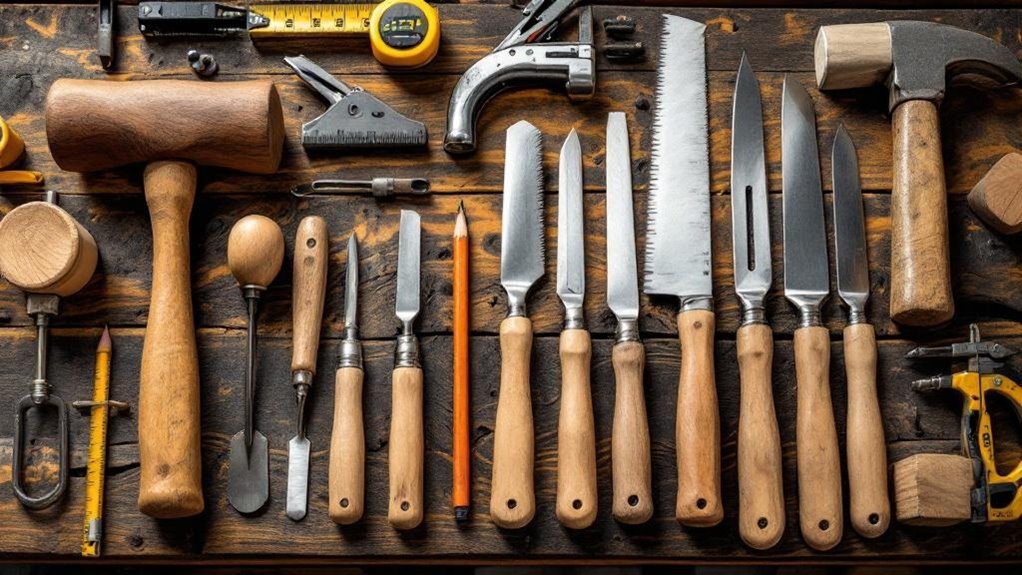
To start woodworking, you need a tape measure, carpenter’s square, clamps, a cordless drill, and a circular saw. Add a sharp chisel set, a hammer or mallet, and a block plane for trimming and fitting parts. Use wood glue and several clamps for strong assembly, and set up a sturdy workbench with safety glasses and hearing protection. As you build projects, you’ll learn which extra tools make your work faster and cleaner.
- Key Takeaways
- What Basic Woodworking Tools Do You Need?
- Start With a Tape Measure and Square
- Mark Wood Accurately Every Time
- Why Clamps Matter in Every Project
- Must-Have Hand Tools for Beginners
- Chisels, Hammers, and Mallets
- Hand Saws for Clean, Controlled Cuts
- Use a Block Plane for Quick Trimming
- Choose a Cordless Drill for Versatility
- Why Every Woodworker Needs a Circular Saw
- When a Jigsaw Makes Cutting Easier
- Random Orbit Sanders for Smooth Finishes
- Router Uses for Beginners
- Why Table Saws Matter
- Planers and Jointers for Flat Lumber
- Must-Have Safety Gear for Woodworking
- Set Up a Simple Workbench
- Wood Glue and Clamps for Strong Assembly
- Basic Finishing Tools and Supplies
- Grow Your Toolkit as You Need It
- Frequently Asked Questions
- Conclusion
Key Takeaways
- Start with a tape measure, carpenter’s square, marking knife, and marking gauge for accurate layout and repeatable cuts.
- Add a cordless drill and circular saw for drilling holes and making fast, straight cuts.
- Keep several clamps on hand to secure parts during cutting, glue-up, and assembly.
- Use basic hand tools like chisels, a hammer or mallet, and a block plane for fitting and shaping.
- Include safety gear and a sturdy workbench or vise to protect yourself and support accurate work.
What Basic Woodworking Tools Do You Need?
A solid starter toolkit begins with the essentials you’ll use on nearly every project: a tape measure for accurate layout, a carpenter’s square for checking 90-degree angles, and clamps to hold pieces steady during cutting and assembly.
Add a cordless drill for boring holes and driving screws, plus a circular saw for fast, accurate cuts. For tighter work, keep hand tools like chisels and a hand saw handy; they give you control during joinery and detail cuts.
A random orbital sander helps you finish surfaces smoothly without swirl marks. As you build, choose quality tools from trusted brands. Durable gear costs more upfront, but it lasts longer, performs better, and supports safer, more precise work on every project you tackle.
Start With a Tape Measure and Square
You’ll get accurate layout lines when you use a reliable tape measure and square from the start.
Choose a sturdy carpenter’s square or combination square, then check your marks before you cut. If you measure twice and cut once, you’ll avoid small errors that can throw off the whole project.
Accurate Layout Lines
Straight, accurate layout lines are the foundation of clean woodworking, and they start with a reliable tape measure and a square. You should read your tape measure carefully, confirm each dimension, and measure twice before you cut once. That habit saves material and keeps your work on track.
Use a carpenter’s square to strike crisp right angles and guide straight cuts. When you need finer control, mark with a marking knife instead of a pencil; the thin incision gives you a sharper, more exact reference line.
A marking gauge helps you duplicate that precision by setting consistent offsets from an edge for joints and other details. With these tools, you’ll lay out parts cleanly and build with confidence.
Choosing A Reliable Square
A reliable square is one of the most important tools in your shop, because it keeps your layout true and your cuts accurate. You should start with the main types of squares: framing square, combination square, and speed square.
For most work, a combination square gives you the best range, since you can mark and verify 90-degree and 45-degree angles with one tool. Choose a steel carpenter’s square when you need durability and want to check larger pieces.
Reach for a miter square when you need quick angle markings. Make sure the markings are clear and easy to read.
Then, regularly test your square against a known straight edge so you keep your tools accurate and your layouts dependable.
Measuring Twice, Cutting Once
Start every layout with a tape measure and square so your dimensions stay accurate and your cuts fit as planned. You should measure twice, then mark once with a pencil or marking knife. A retractable steel tape gives the best accuracy; use digital or laser models only when longer spans make sense. Check every edge with a carpenter’s square before you cut, because right angles protect joint fit and alignment.
| Tool | Best Use | Result |
|---|---|---|
| Tape measure | Confirm lengths | Fewer mistakes |
| Square | Verify angles | Straighter joints |
| Marking tool | Trace lines | Cleaner cuts |
When you keep measuring twice and follow your marks, you’ll make precise cuts, waste less stock, and build projects that fit together cleanly and work better overall.
Mark Wood Accurately Every Time
You need measuring tools that matter, like a reliable tape measure, carpenter’s square, and combination square, so you can check lengths and right angles with confidence.
For layout, use a marking knife, fine pencil, or marking gauge to create clean, exact lines that guide your cuts and joinery.
Measure twice, cut once, and you’ll mark each piece accurately with less waste and fewer mistakes.
Measuring Tools That Matter
Accurate woodworking starts with the right measuring tools, and a retractable steel tape measure is the backbone of most layouts, with a 25-foot model giving you dependable reach for nearly any project. Use a carpenter’s square to confirm 90-degree corners, and keep a combination square handy for checking lengths and angles. A marking gauge helps you scribe repeatable, parallel lines from an edge, while a marking knife gives cleaner layout than a pencil.
| Tool | Best Use | Why It Matters |
|---|---|---|
| Tape measure | Long dimensions | Reliable reach |
| Carpenter’s square | Corner checks | True angles |
| Combination square | Measuring and angles | Versatile control |
| Marking gauge | Parallel lines | Consistent offsets |
| Marking knife | Fine layout | Reduces error |
Measure twice, cut once, and you’ll waste less stock and finish with tighter joinery every time.
Reliable Layout Marking
Precise layout begins with tools that let you mark clean, repeatable lines, and a marking knife is one of the best for the job because it cuts a fine groove that guides the saw and helps reduce tear-out.
You should pair it with a combination square to check right angles and scribe accurate lines. For longer spans, use a retractable steel tape measure; it stays durable and reads clearly on shop stock.
Marking gauges help you set a fixed distance from an edge, so your layout marking stays consistent when you cut joints or align parts.
Measure twice before you mark, then commit only when the numbers match. With these habits, you’ll waste less wood, make cleaner cuts, and work faster with confidence on every project.
Why Clamps Matter in Every Project
Clamps are one of the most important tools in woodworking because they hold workpieces securely during cutting, assembly, and finishing, helping prevent movement and improve accuracy. When you use clamps, you keep parts aligned and reduce the risk of errors that can ruin a fit.
F-clamps, bar clamps, and pipe clamps give you the range you need for different sizes and shapes. During glue-up, steady pressure helps the wood glue bond evenly, which strengthens the joint and improves durability.
A small set can slow you down, so invest in several types to speed setup and support each project better. For most beginners, four to six reliable clamps will cover small to medium woodworking tasks without constant repositioning or interruption.
Must-Have Hand Tools for Beginners
When you’re starting out in woodworking, five hand tools cover most of the basics: a tape measure, a carpenter’s square, clamps, chisels, and a block plane.
Use a tape measure to check stock carefully, and follow the rule to measure twice, cut once. Keep a carpenter’s square nearby to mark right angles and verify cuts; a combination square gives you added flexibility.
Clamps hold parts steady, so you can cut and assemble with confidence. Choose a mix of bar and pipe clamps for better support.
Chisels help you refine joinery and reach tight details. A block plane lets you trim edges and make small, accurate adjustments to finished surfaces.
With these hand tools, you’ll work cleaner, faster, and with more control from the start.
Chisels, Hammers, and Mallets
Choose chisels in several widths so you can match the tool to the cut, and start with bevel-edge chisels for the most versatility.
Use a well-balanced hammer when you need firm control for striking chisels or assembling joints, but switch to a wooden or rubber mallet when you want a softer blow that won’t punish the chisel edge.
Keep your chisels sharp, because a keen edge cuts cleaner, requires less force, and makes every strike more accurate.
Chisel Width Selection
Chisel width matters because the size you pick should match both the detail and the amount of wood you need to remove. For chisel width selection, keep a set of chisels in useful sizes, from 1/4 inch to 2 inches, so you can switch from fine trim to broad shaping without hesitation. A four-piece bevel-edge set in 6mm, 13mm, 19mm, and 25mm covers most tasks.
| Width | Best use |
|---|---|
| Narrow | Mortising, trimming |
| Wide | Fast stock removal |
Choose narrower blades for accuracy and wider ones for quicker paring. High-carbon steel matters, too, because it holds an edge longer and sharpens cleanly. With the right chisels, you work faster, stay precise, and keep your cuts controlled.
Hammer And Mallet Use
A good strike starts with the right tool in your hand: use a hammer for nails and a mallet for chisels. Choose a 16- to 20-ounce hammer for most woodworking; its claw, ball peen, or sledge design suits specific jobs. Keep your grip firm and strike squarely so you drive fasteners cleanly without bruising the stock.
When you work with chisels, switch to a wood or rubber mallet. It gives you controlled force and protects the cutting edge during joinery and shaping. Match your chisel widths to the cut, from 6 to 25 mm, and let the mallet do the driving.
Sharpen chisels often, and inspect both hammer and mallet for wear. Good maintenance improves accuracy, safety, and tool life.
Hand Saws for Clean, Controlled Cuts
Hand saws are essential when you need clean, controlled cuts that power tools can’t always match, especially in detailed woodworking.
You’ll rely on hand saws for clean cuts across the grain with a crosscut saw, along the grain with a rip saw, and in joinery with a backsaw’s stiff blade.
Choose the tooth count for the job: 12–14 TPI gives smoother results, while 5–7 TPI cuts faster but rougher.
Keep the blade sharp with files or honing stones, because a dull saw drifts, tears fibers, and raises injury risk.
Use a steady hand, align the saw carefully, and let the tool do the work. That control helps you cut accurately, reduce fatigue, and finish your layout with confidence.
Use a Block Plane for Quick Trimming
Use a block plane to trim edges quickly, giving you clean, controlled results with little effort.
You can smooth small imperfections and refine end grain by keeping a steady angle and light pressure.
It’s also handy for setup adjustments, like fitting doors and drawer fronts with precision.
Quick Edge Trimming
For quick edge trimming, a block plane gives you fast, controlled removal with one hand, making it ideal for small projects and tight spaces. Use the block plane for edge trimming when you need a clean, accurate fit without setting up larger tools. Keep the blade sharp and adjusted correctly so it cuts cleanly instead of tearing fibers. The low blade angle, about 20 degrees, helps you work end grain with less effort.
| Setting | Effect | Use |
|---|---|---|
| Sharp blade | Cleaner cut | Fine edge work |
| Open throat | Thicker shavings | Faster removal |
| Narrow throat | Thinner shavings | Delicate control |
Clean and sharpen the tool regularly, and it’ll stay reliable.
Smoothing Small Imperfections
Tiny flaws don’t need a big tool. You can reach for a block plane when a surface needs quick trimming and a cleaner finish. Its compact body fits comfortably in your hand, so you can guide it into tight spots and corner details with control.
Set the blade for a light cut, then hold the tool at a slight angle to the grain. That lets you shave off thin layers without tear-out. Make short, even passes and check the surface often; you only want to remove the high spots.
Keep the blade sharp, and the plane will cut smoothly with less effort. With careful use, this hand tool leaves small imperfections level and the wood ready for finer finishing steps.
Handy Setup Adjustments
When a joint or edge needs a quick correction, a block plane gives you precise control without a lot of setup. You can trim high spots, ease corners, and smooth end grain with one compact tool. Its low-angle blade cuts efficiently, and its small, lightweight body lets you make fine adjustments faster than most handheld power tools.
- Remove tiny ridges on joints
- True an edge before assembly
- Trim end grain cleanly
- Blend slight misfits
- Keep the blade sharp
Keep your block plane tuned, and sharpen the blade with a diamond sharpening stone for clean cuts.
You’ll get better control, fewer tear-outs, and a more professional finish on every project.
Choose a Cordless Drill for Versatility
A cordless drill is one of the most versatile tools in a woodshop, letting you drill holes and drive screws without being tied to an outlet. Choose a cordless drill for versatile woodworking tasks, and you’ll gain speed and flexibility on every project.
For most home work, an 18-volt model gives you solid power without sacrificing battery life. Use adjustable torque settings to match the material and avoid stripping screws or damaging thin stock. A keyless chuck lets you swap bits quickly, so you can move from drilling to driving without interruption.
Modern lithium-ion batteries charge faster and run longer, which helps when you’re working through long sessions. Pick a model with a comfortable grip, and you’ll handle routine shop work with confidence and control.
Why Every Woodworker Needs a Circular Saw
After you’ve covered drilling and driving, the next tool that opens up bigger woodworking jobs is a circular saw. You’ll use this Essential Tools staple to make precise straight cuts in large sheets and handle basic builds with confidence.
A circular saw uses a spinning toothed blade, and you can swap in ripping, crosscutting, or combination blades to match the cut you need. Its portability lets you move easily around a job site, unlike larger stationary saws.
- Choose a 7 ¼-inch model for most tasks
- Cut hardwoods with solid power
- Improve accuracy on sheet goods
- Reduce project time
- Stay flexible on site
When you invest in a quality circular saw, you sharpen efficiency and strengthen every part of your toolkit.
When a Jigsaw Makes Cutting Easier
You’ll reach for a jigsaw when you need clean curves or intricate shapes that a straight saw can’t make as easily.
Its reciprocating blade and changeable blade types let you match the cut to the material, so you can work more precisely on thin stock or detailed profiles.
For interior cuts, drill a pilot hole first, then start the blade inside the workpiece to cut openings in panels or blanks.
Curved Cut Advantages
When your project calls for curves, tight corners, or decorative patterns, a jigsaw often makes the work easier than a straight saw. You can cut wood with more freedom, control, and less waste, especially when you need smooth lines. The blade’s reciprocating motion and adjustable speed help you steer through detailed shapes without forcing the tool.
- Trace your curve clearly before you start.
- Match the blade to the material.
- Slow the jigsaw in tight turns.
- Keep steady pressure, not heavy force.
- Choose a narrow blade for finer control.
That versatility lets you shape parts that other saws struggle to follow. With the right blade and speed, you’ll turn rough stock into accurate curves and refined patterns with confidence.
Interior Cut Techniques
For interior cuts, a jigsaw gives you the reach and control to handle curves, openings, and other shapes inside a board. With sound interior cut techniques, you start by drilling a pilot hole large enough for the jigsaw blade, then lower the blade and follow your layout carefully.
Choose fine-toothed blades for hardwood so you get a smoother edge and less tear-out. Set the jigsaw speed to match the material: slower for delicate work, faster for softer stock.
If you need a straighter edge, clamp a guide or straightedge beside your line and let the shoe ride against it. Keep the tool steady, let the blade do the work, and you’ll make clean, accurate cuts in tight spaces.
Random Orbit Sanders for Smooth Finishes
Random orbit sanders are a go-to tool when you want a smooth, swirl-free finish on wood. As a beginning woodworker, you’ll find the random orbital sander easy to control and forgiving on large panels or tight spots.
Its pad spins and orbits at once, which helps you level surfaces without leaving obvious marks. Use it with different grits to move from shaping to final smoothing.
- Lightweight handling
- Even sanding action
- Cleaner dust control
- Multiple grit options
- Budget-friendly cost
Most models include dust collection, so your workspace stays cleaner and you breathe less debris. Since many cost under $100, you can add one to your kit without stretching your budget.
Choose steady pressure, keep it moving, and let the tool do the work.
Router Uses for Beginners
A router opens up a lot of possibilities once you’ve got your surfaces smoothed and ready. You can use a router to shape clean decorative edges on furniture, giving your projects a refined look.
With the right bit, you can also handle joinery work like mortises and dovetails, which create strong, interlocking connections. That same flexibility lets you cut inlays, round over tabletops, and produce other profiles without changing tools.
Keep your workpiece clamped firmly and guide the router with steady pressure so you don’t chip or tear the grain.
If you’re starting out, a compact or trim router is a smart choice: it’s affordable, easy to control, and powerful enough for most small to medium projects.
Why Table Saws Matter
Table saws matter because they give you clean, precise straight cuts that are hard to match with handheld saws. A table saw is one of the essential woodworking tools because you feed the workpiece against a stationary blade, which keeps your cuts consistent and accurate.
- Rip boards safely and evenly
- Crosscut parts to exact length
- Tilt the blade for angled cuts
- Use fences for repeatable alignment
- Add miter gauges for controlled cuts
When you choose a quality table saw, you gain control for dados, joinery, and other detailed tasks.
That precision raises your craftsmanship and helps you work faster without sacrificing accuracy.
Planers and Jointers for Flat Lumber
While table saws give you accurate cuts, planers and jointers prepare the lumber itself so those cuts fit better and look cleaner.
You use jointers first to flatten one face and square one edge, which turns rough-sawn stock into a reliable reference. Then you run the board through planers to remove material evenly and bring it to a consistent thickness.
Flatten one face and square one edge first, then plane to a consistent thickness.
This two-tool workflow gives you flat, stable lumber and improves every later cut, joint, and glue-up. Many home woodshops can handle portable jointers up to 6 inches and planers up to 12 inches wide, so you can process common boards with ease.
When you use planers and jointers correctly, you boost accuracy, reduce twist, and get tighter-fitting projects with less frustration.
Must-Have Safety Gear for Woodworking
What safety gear should you reach for before you start a cut? Start with safety glasses and hearing protection. They shield you from flying debris and the steady roar of power tools, helping you work longer and safer.
Add a dust mask or respirator when you sand or apply finishes, since fine dust and VOCs can irritate your lungs. Choose fitted gloves only when the task allows them; they can improve grip and help block splinters and cuts.
Keep a first aid kit close so you can treat small injuries fast.
- Safety glasses
- Hearing protection
- Dust mask or respirator
- Fitted gloves
- First aid kit
Set Up a Simple Workbench
A simple workbench gives you a flat, stable surface that makes every woodworking task easier and safer.
Build your workbench from a sturdy 2×4 frame, then add a solid top made from laminated plywood or hardwood so it stays flat under daily use. Set the height to match your body, usually 30 to 36 inches, so you can work without strain.
Aim for a surface at least 24 by 48 inches; that size fits most DIY projects while still leaving room to move. Mount a vise or clamp holding system on the workbench to secure parts during cutting and assembly.
With a well-sized, rigid bench, you’ll gain control, improve accuracy, and make every project more efficient.
Wood Glue and Clamps for Strong Assembly
Once your parts are cut and dry-fit on the bench, wood glue and clamps turn separate pieces into a strong assembly. You should choose the right wood glue for the job, then apply it evenly so you fill gaps without flooding the joint. PVA glue works for most shop projects, while water-resistant formulas suit outdoor work.
Choose the right wood glue, spread it evenly, and clamp firmly for a strong, lasting bond.
Then you clamp the parts firmly so they can’t shift as the bond cures.
- Use bar clamps for long joints
- Use F-style clamps for smaller parts
- Spread glue across both mating surfaces
- Tighten clamps until pressure feels even
- Wipe squeeze-out before it sets
With careful setup, your clamps keep the pieces aligned and your glue cures into a bond that’s often stronger than the wood itself.
Basic Finishing Tools and Supplies
Finishing starts with the right tools, because how you apply a stain, paint, or sealant affects both appearance and durability. You’ll use finishing tools like brushes, rollers, and spray applicators to match the coating and surface. Before you finish, smooth the wood with sanding blocks or sanding sponges to remove flaws.
| Supply | Use |
|---|---|
| Brush | Detail work |
| Roller | Flat surfaces |
| Spray applicator | Even coats |
| Sanding sponge | Final smoothing |
| Gloves and mask | Protection |
Choose finishes such as oil-based, water-based, or lacquer based on the look and wear you need, and test them on scrap first. Keep wood glue handy for repairs or small adjustments, and always wear gloves and a mask to limit chemical and dust exposure.
Grow Your Toolkit as You Need It
With finishing handled, you can build out your shop in a practical way by adding tools only when your projects call for them.
Start with a tape measure, carpenter’s square, and clamps as your first toolset for accurate layout and solid assembly. Then grow your toolkit with a cordless drill and circular saw when those tasks become routine.
Start with a tape measure, square, and clamps, then add a drill and saw when you need them.
- Buy for the project, not the fantasy
- Keep hand tools ready for control and finesse
- Choose quality over quantity every time
- Add power tools only when they save real time
- Stay flexible so your kit adapts as you learn
This approach keeps costs controlled and prevents unused gear from crowding your space.
Well-made tools last longer, perform better, and usually cost less over time.
Frequently Asked Questions
What Wood Species Are Easiest for Beginners to Work With?
Pine, poplar, and basswood are easiest for you to work with. They cut cleanly, sand smoothly, and cost little. You’ll also find them forgiving when you’re learning to measure, saw, and join accurately.
How Do I Choose Between Hand Tools and Power Tools?
Like choosing a steady compass or a roaring engine, you should pick hand tools for control, quiet, and skill-building; choose power tools when you need speed, repeatability, or to tackle larger projects efficiently.
What Size Workspace Do I Need to Start Woodworking?
You can start woodworking in about a 6-by-8-foot area if you organize well. You’ll need room for material, a bench, and movement. Bigger projects need more space, but you can expand later.
How Should I Sharpen and Maintain Beginner Hand Tools?
You should hone blades with a fine stone, flatten backs, and strop edges regularly. Wipe tools dry, oil metal, and store them safely. Check handles, tighten fittings, and sharpen before tools feel dull.
What Budget Should I Set for My First Woodworking Tools?
If you think you need thousands, you’re wrong: set aside $150–$400 for solid first tools. You’ll buy essentials, sharpen them, and upgrade slowly, avoiding waste while building skills and confidence efficiently.
Conclusion
With just a tape measure, square, a few clamps, and a couple of reliable hand tools, you’re ready to start woodworking today. As you build your first project, you’ll notice something satisfying: the more carefully you measure and secure each joint, the better everything fits. That isn’t luck—it’s the craft working for you. Start simple, keep your bench organized, and add tools only when your projects truly call for them.