
Affiliate Disclosure: Some of the links in this post are affiliate links. This means we may earn a small commission if you make a purchase through these links—at no extra cost to you. We only recommend products and tools that we genuinely believe will help you with your woodworking projects.
You can refresh blank walls on a budget by choosing one strong focal wall and building around it with thrifted frames, printed photos, and Dollar Tree finds. Mix family snapshots, postcards, sketches, or initials on canvas for a personal gallery. Add plates, mirrors, open shelves, or fabric panels for texture and depth. Keep your palette cohesive, vary frame sizes, and balance the layout so it feels polished. There’s plenty more to shape your space.
- Key Takeaways
- Budget-Friendly DIY Wall Decor Ideas
- Choose the Right Wall First
- Hang Plates and Platters for Charm
- Use Mirrors to Brighten Dark Walls
- Build a Personal Gallery Wall
- Frame Pages From a Book
- Make Monogram Art on a Budget
- Add a Peg Shelf for Style and Storage
- Install Book Ledges for Easy Display
- Frame an Heirloom With Meaning
- Print and Frame Free Artwork
- Display a Family Recipe as Art
- Make a Family Command Center
- Create a Chalkboard Wall
- Style Family Portraits and Photos
- Turn Silhouettes Into Keepsakes
- Use Open Shelves for Wall Decor
- Mix Wall Decor for a Finished Look
- Frequently Asked Questions
- Conclusion
Key Takeaways
- Use thrifted frames, Dollar Tree items, and printed photos to create affordable gallery walls.
- Repurpose fabric panels, macramé, canvases, and wood for added texture and warmth.
- Choose a focal wall with good lighting, then measure carefully for balanced placement.
- Mix frame sizes, styles, and colors within a unified palette for a polished look.
- Add mirrors, plates, heirlooms, or family recipes to make the wall personal and functional.
Budget-Friendly DIY Wall Decor Ideas
When you want to refresh a room without spending much, thrift store finds and repurposed materials can do a lot of the heavy lifting. You can build DIY wall decor that feels personal by hanging printed photos in thrifted frames or cheap Dollar Tree finds.
Turn a blank budget-friendly wall into a gallery by mixing family snapshots, postcards, and simple sketches. For a softer look, add fabric panels, macramé, or other textiles that bring warmth and texture.
If you enjoy a hands-on diy project, try painting canvases, stenciling patterns, or layering recycled paper into collages. These ideas let you make striking art with basic supplies, so your walls look curated, creative, and completely yours without stretching your budget.
Choose the Right Wall First
Start with one wall that can actually carry the room—usually the backdrop behind a sofa, dining table, entry bench, or another high-visibility spot.
To choose the right wall, assess the size, function, lighting, and visibility before you commit. You’ll want the wall that supports the room’s visual focal point and fits the overall design instead of competing with it.
In living rooms, dining areas, and entryways, a strong backdrop makes your decor feel intentional. Check the surface too: smooth, neutral walls usually give you more freedom and keep the look clean.
Measure carefully so you can plan placement with confidence, leaving enough open space for a harmonious balance between decor and wall.
Hang Plates and Platters for Charm
You can group ironstone plates or mix varied designs to create a striking focal point that brings charm and texture to your wall.
Try arranging them above a kitchen window or in a dining area, where their shapes and colors can stand out beautifully. This approach makes it easy to refresh your display whenever your style changes.
Plate Grouping Ideas
A cluster of ironstone plates can turn a blank wall into a focal point, especially in a dining area or above a kitchen window.
With smart plate grouping, you’ll add visual interest without spending much, and you can build a personalized aesthetic by mixing shapes, colors, and patterns that suit your taste. Decor enthusiasts love this approach because it feels collected, not costly.
Use inexpensive adhesive plate hangers for a damage-free setup, which makes the idea ideal if you rent or don’t want to drill. Arrange the pieces loosely or in a tighter composition, then swap items whenever your style changes.
Since you can rearrange everything easily, this display stays fresh, flexible, and stylish as trends evolve.
Styling Above Windows
Hanging plates and platters above a window is an easy, inexpensive way to turn that overlooked strip of wall into a charming focal point. You can use ironstone pieces in mixed sizes, colors, and patterns to create a wall hanging that feels collected and personal.
This simple DIY Wall Decor Ideas approach fills empty space, adds a touch of warmth, and draws the eye upward, making your kitchen or dining area feel finished. Because the display sits on an affordable wall zone, you don’t need much to make it stand out.
Try arranging pieces in a balanced row, a loose arc, or another creative pattern. Best of all, you can swap plates anytime, so your look stays fresh through seasons and style changes.
Use Mirrors to Brighten Dark Walls
Mirrors can instantly brighten dark walls by reflecting both natural and artificial light, which makes your space feel more open and inviting. You can use mirrors to reflect light and turn dull accent walls into stylish wall art ideas that feel polished and practical.
Choose shapes that suit your room, and let them do double duty as decor and brightness boosters.
- Hang a round mirror to soften sharp angles.
- Place a large mirror where it catches window light.
- Mix smaller mirrors at different heights for depth.
- Group mirrors in a simple layout for extra sparkle.
With smart placement, mirrors add warmth, enlarge the room visually, and keep your DIY wall decor looking fresh without much effort.
Build a Personal Gallery Wall
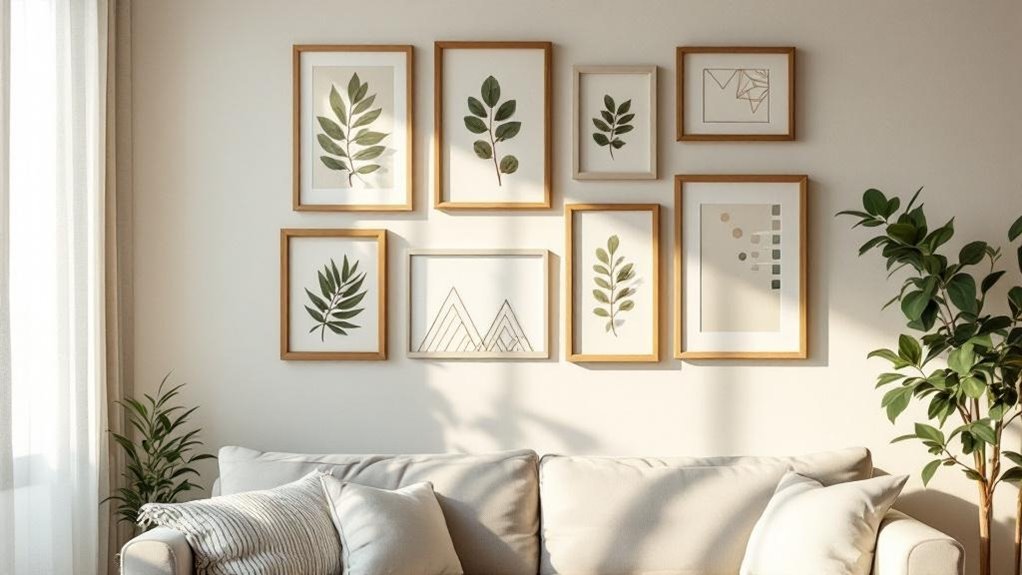
You can make your gallery wall feel personal by choosing photos and artwork that actually mean something to you, from family snapshots to favorite prints.
Mix frame sizes, shapes, and finishes to create movement and keep the display visually interesting. Plan the layout first, then arrange everything so it looks balanced and intentional on the wall.
Choosing Meaningful Photos
- Pick images that remind you of real moments and people.
- Mix classic and modern frames to create visual interest.
- Use a cohesive color palette so each photo feels connected.
- Refresh the gallery wall with new photos as your life changes.
You’ll also want to choose shots that work well together, balancing bright and quiet images.
A thoughtful selection helps your wall feel stylish, unified, and alive. When you update it regularly, you keep the story current and meaningful.
Arranging Frames Creatively
To build a personal gallery wall that feels intentional, mix frame styles, colors, and sizes so the display has movement and personality.
When you’re arranging frames creatively, start with personal photographs, then add art prints or meaningful quotes for a story that feels complete. Keep a consistent color palette or theme so everything works together without overpowering the room.
For larger walls, try an expansive layout or clustered grouping; in smaller spaces, choose a tighter arrangement. Before you hang anything, lay the pieces on the floor and test a grid pattern or eclectic design.
That simple step helps you create a visually appealing display and avoid mistakes. With a few smart choices, your gallery wall will look curated, balanced, and uniquely yours.
Frame Pages From a Book
Framing pages from a book is an easy, inexpensive way to turn beautiful illustrations or sentimental text into one-of-a-kind wall art. You can create framed DIY decor that helps you personalize your space while giving old books a second life.
Just tear out the pages you love, then place them in thrifted frames for a polished look.
- Choose pages with bold art or meaningful words.
- Match frame sizes to your pages.
- Mix colors and styles for a lively gallery wall.
- Use children’s book illustrations for nurseries or playrooms.
This simple project brings charm, character, and budget-friendly style to any room.
Make Monogram Art on a Budget
You can make stylish monogram art with cheap materials like canvas, wood boards, or even paper, so it won’t strain your budget.
Paint it yourself with a stencil or freehand design to match your room’s colors, and add simple accents like florals or shapes for extra charm.
It’s a perfect DIY for nursery and kids’ rooms, where a personalized touch goes a long way.
Cheap Monogram Materials
A few low-cost supplies can turn a simple monogram into polished wall art without stretching your budget. For DIY wall art, start with cardboard or foam board from craft stores for under $5, then shape your personalized monogram with a free online template.
- Choose a sturdy base: cardboard or foam board keeps costs low.
- Add color with acrylic or craft paint, usually $1-$3 per shade.
- Use scrap fabric or felt for texture; it’s a budget-friendly way to add depth.
- Finish with thrifted or DIY frames to make it look styled and complete.
You don’t need fancy tools to make something that feels custom. With smart picks, you can build attractive, affordable wall decor that matches your room and your taste.
Easy DIY Painting
If you liked the budget-friendly monogram base from before, painting it’s the next easy step to make it feel finished. You can turn simple initials or a family name into polished DIY art with a few cheap supplies.
Grab canvas, wood, or sturdy paper from a craft store for under $10, then sketch your design with stencils or freehand lines. Choose acrylic paint in colors that match your room; tubes usually cost just $1–$3, so you can keep it budget-friendly.
Use one bold shade or layer a few tones for depth. Keep your strokes clean, let each coat dry, and finish by placing the piece in a thrifted frame. That small detail makes your wall art look intentional and stylish.
Nursery And Kids’ Rooms
For nursery and kids’ rooms, DIY monogram art is an easy way to add personality without spending much. You can make a personalized piece for under $20 with cardstock, paint, or repurposed materials from home.
Try these ideas:
- Hand letter an initial on heavy paper for a clean, stylish look.
- Use stencils to match the room’s theme and color scheme.
- Paint a wooden letter for a bold wall focal point.
- Invite kids to help with simple hands-on projects.
This DIY home decor project can shift the room feel fast, giving you a custom statement piece that looks polished without a big budget.
With a little creativity, you’ll create art that feels thoughtful, fun, and truly theirs.
Add a Peg Shelf for Style and Storage
Add a peg shelf to bring in both style and storage, giving you a simple way to display keepsakes, medals, favorite books, or small collectibles while making better use of vertical wall space.
A peg shelf blends function with flair, so you can cut clutter and add interest at the same time. Choose paint, stain, or hardware that matches your personal taste and the rest of your wall decor.
For DIY enthusiasts, the project’s simple installation makes it an easy weekend upgrade. In kids’ rooms or play areas, it keeps small items organized while still looking playful and polished.
You’ll get a flexible display that feels custom, practical, and budget-friendly.
Install Book Ledges for Easy Display
Book ledges give you an easy way to turn books and small decorative items into part of your wall decor while keeping them within reach.
With a simple DIY setup, you can transform plain walls into a neat, useful display that feels stylish and intentional. They work especially well in kids’ rooms, play areas, nurseries, and kitchens because you can see and grab what you need fast.
A simple DIY setup can turn plain walls into a stylish, useful display that keeps essentials easy to reach.
- Use wood or brackets for a budget-friendly build.
- Choose lengths that fit your wall space.
- Match colors and materials to your room.
- Arrange books and decor for a clean, layered look.
Frame an Heirloom With Meaning
If you want wall decor that feels truly personal, frame an heirloom and give it a place of honor. You can turn hospital gowns, baby clothes, or other keepsakes into unique wall art that preserves family memories and heritage.
Choose a shadow box or floating frame to protect delicate fabric while keeping it elegant. Pick a thematic frame that complements the item’s colors and texture, so the display feels intentional. This affordable DIY art adds a personal touch and sparks conversation whenever guests notice it.
You’re not just decorating a wall; you’re honoring a story that matters. With simple tools and careful placement, you can create meaningful decor that looks polished, stylish, and one of a kind.
Print and Frame Free Artwork
When you want art that looks curated without the price tag, print free public domain pieces from museums and art institutions online. You can build stylish decor fast, and the results often feel more personal than store-bought prints.
Choose artwork that fits your color palette, then frame it in thrifted or secondhand finds for less.
- Print in different sizes for visual rhythm.
- Mix frame styles to add depth.
- Group pieces into a cohesive gallery wall.
- Swap seasonal artwork to keep your decor fresh.
With a little planning, you’ll create a polished wall that feels intentional, affordable, and easy to update.
Display a Family Recipe as Art
A cherished family recipe can become wall art that feels both personal and polished. You can frame a handwritten card, a stained index page, or even transfer the words onto Framed Fabric for a softer look.
A cherished family recipe can become wall art, blending personal meaning with a polished, timeless look.
Simple frames keep the project budget-friendly, and matching it to your existing Wall Hangings makes the display feel intentional. This piece is deeply personal, yet it still works as a stylish focal point in your kitchen or dining area.
When guests notice it, you’ll likely start conversations and share the story behind the dish. Better yet, you can involve your family in choosing the recipe, which helps preserve memories and traditions.
The result adds a warm and inviting atmosphere while reminding you of gatherings, flavor, and home.
Make a Family Command Center
Create a family command center in a busy spot like the kitchen or entryway to keep calendars, reminders, and chore charts in one easy-to-see place. Your budget wall can do more than look nice—it can boost organization and cut daily confusion.
Use affordable supplies from dollar stores, then build a command center that fits your style and routine.
- Mount a bulletin board for schedules and notes.
- Add framed spaces for each family member.
- Use colored paper to assign tasks clearly.
- Include a wipe-clean area for quick updates.
This simple wall setup helps everyone stay informed, accountable, and connected.
You’ll reduce clutter, improve communication, and create a stylish system that works hard every day.
Create a Chalkboard Wall
Turn a plain wall into a playful, practical chalkboard with a quart of chalkboard paint, which usually costs about $20 and works on any smooth surface.
Clean your wall, then apply two coats of paint to create a smooth chalkboard wall that can transform your space fast. Let it cure for at least 3 days before you write on it, so the finish bonds properly.
Once it’s ready, use it for notes, meal plans, doodles, or quick reminders in a kitchen, playroom, or home office. Add simple molding around the edge if you want a polished look without spending much.
Keep the surface conditioned with chalk now and then, and you’ll protect it from dullness while keeping creativity easy to erase, refresh, and enjoy for years.
Style Family Portraits and Photos
Choose cohesive frames so your family portraits feel polished and work together, whether you’re styling a foyer or a living room wall.
Arrange the pieces with visual balance by mixing large prints, smaller photos, and open space so the display feels intentional.
Add keepsakes alongside your photos to give the wall more personality and turn it into a story that’s uniquely yours.
Choose Cohesive Frames
Cohesive frames can instantly pull your family portraits and photos together, giving your wall a polished look that still feels personal. When you choose cohesive frames, you help each image share the spotlight and keep the display looking intentional.
- Pick uniform frame colors to unite different prints and snapshots.
- Mix frame sizes for depth, while keeping one consistent style or finish.
- Refresh thrifted finds with a fresh coat of paint to match your decor.
- Use the same frame family across portraits, candid shots, and vacation photos.
This simple approach makes your wall feel curated without raising costs. You can update it anytime, swap pieces easily, and let your favorite memories shine in a clean, stylish arrangement.
Arrange for Visual Balance
Once you’ve chosen frames that work well together, you can arrange your family portraits and photos to create visual balance throughout the room.
To arrange for visual balance, mix frame sizes and styles, but keep the color palette unified so the display feels polished. Hang key pieces in entryways or living rooms, where visitors can notice them right away and feel the warmth of your home.
Build a gallery wall by grouping related images together, then vary the layout to add depth and movement. This approach lets you showcase personal milestones without cluttering the space.
When you display portraits and photos in a cohesive manner, you turn everyday walls into a stylish story that feels inviting, organized, and personal.
Mix Photos and Keepsakes
Family memories shine brightest when you mix portraits with meaningful keepsakes, creating a display that feels personal and lived-in. You can mix photos and keepsakes to build a budget-friendly gallery wall that adds warmth and style. Frame family portraits in varied sizes, then pair them with handwritten letters, ticket stubs, or tiny mementos to deepen your personal history.
- Choose a few favorite prints.
- Add one or two keepsakes.
- Vary frame styles for interest.
- Hang the display in a hallway or living room.
Digital prints work well too, especially when you balance them with physical items. This mix keeps your wall decor modern, meaningful, and easy to update over time.
Turn Silhouettes Into Keepsakes
Turn everyday profiles into keepsakes by tracing the outline of a family member or pet against a contrasting background, then mounting the silhouette in a simple black frame for a clean, striking look.
You’ll add silhouettes to your decor with a personalized touch that feels thoughtful and timeless. Choose cardstock, fabric, or patterned paper as backing to make the piece echo your room’s style, whether modern or vintage.
Because you can scale the prints to fit any wall, this project works in a hallway, bedroom, or nursery. Invite kids to help trace shapes and pick colors; they’ll love seeing their handiwork become meaningful art.
Scaled to fit any wall, these keepsakes brighten hallways, bedrooms, and nurseries with a personal, creative touch.
With minimal supplies and a little creativity, you’ll turn a basic outline into an elegant keepsake that captures a memory and stays budget-friendly.
Use Open Shelves for Wall Decor
Open shelves give you a stylish way to show off books, plants, and favorite finds while adding character to your walls.
You can also use them for practical storage, keeping everyday items within easy reach and your space looking organized.
Mix heights, textures, and colors to make the display feel intentional and fresh.
Stylish Display Solutions
A few well-placed shelves can do more than hold items—they can turn a blank wall into a polished display. With open shelves, you get stylish display solutions that blend storage and room decor without feeling heavy. You can show off collectibles, books, or keepsakes, and let your personal taste guide each choice.
- Mix short and long shelves for visual rhythm.
- Place favorite objects at eye level.
- Rotate seasonal accents to keep things fresh.
- Keep spacing open so each piece stands out.
You’ll add depth, color, and balance while making the wall feel intentional.
In kitchens, living areas, or nurseries, these shelves help your room flow and stay inviting.
Functional Wall Storage
If you want your wall decor to work harder, open shelves are a smart next step. You get functional storage and a polished display in one simple upgrade. Use open shelves to show books, collectibles, and personal items, then mix in succulents or small sculptures for a personalized touch.
Choose varied shelf lengths and depths to create movement and make the most of vertical wall space. In kitchens, living rooms, or entryways, open shelving can match your style without feeling heavy.
It also gives you practical organizational solutions, helping you keep essentials tidy while still looking intentional. With a few well-placed pieces, your wall becomes both useful and beautiful, and your room feels more open, balanced, and thoughtfully styled.
Mix Wall Decor for a Finished Look
Layering wall decor gives your space a finished, collected feel. You can mix wall decor with framed art, mirrors, and textiles to build a display that feels intentional.
Focus on mixing textures to add depth: wood warms, fabric softens, and metal sharpens the look. Include personal elements like family photos or handmade pieces so your wall tells your story.
- Choose a cohesive color palette for balance.
- Hang larger pieces first, then fill gaps.
- Blend shapes and materials for contrast.
- Rotate decor items to keep the look fresh.
When you edit carefully, your wall feels polished, dynamic, and uniquely yours. Use fewer pieces, but let each one earn its place.
Frequently Asked Questions
How to Decorate Walls Inexpensively?
You can decorate walls inexpensively with thrifted frames, family photos, hanging plates, DIY art, and pressed flowers. Add plants, bulletin boards, or a chalkboard for style and function, and you’ll fill space affordably.
What Is the 2/3 Rule for Wall Art?
The 2/3 rule means you hang art so it fills about two-thirds of your wall’s space, creating balance like a well-fitted frame. You’ll want to size pieces, spacing, and height so they don’t overwhelm.
What Is the Cheapest Thing to Put on Walls?
The cheapest thing you can put on walls is usually DIY art: paper prints, washi tape designs, or free printable images. You can thrift frames, use scraps, and create a personal look without spending much.
How to Improve Home Decoration With a Low Budget?
Your walls are a blank canvas: use washi tape art, thrifted frames, and family photos to add style cheaply. You’ll boost charm with hanging plants, peg shelves, and DIY collages that reflect your taste.
Conclusion
You can transform any blank wall into a stylish focal point without overspending. In fact, studies show that 60% of people notice wall decor first when they enter a room, so your choices really matter. Pick one wall, mix plates, mirrors, photos, and shelves, and keep the arrangement balanced. When you combine personal pieces with smart DIY ideas, you’ll create a warm, finished look that feels polished, practical, and uniquely yours.