Affiliate Disclosure: Some of the links in this post are affiliate links. This means we may earn a small commission if you make a purchase through these links—at no extra cost to you. We only recommend products and tools that we genuinely believe will help you with your woodworking projects.
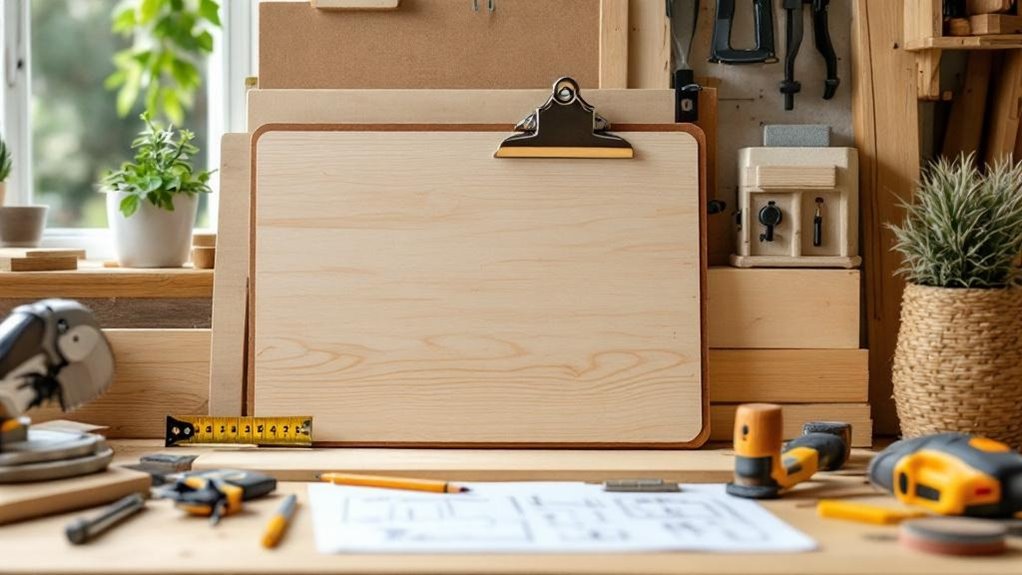
Beginner-friendly woodworking plans give you step-by-step instructions, clear diagrams, and exact material lists so you can measure, cut, and assemble with less guesswork. You’ll usually start with simple projects like cutting boards, shelves, coasters, or picture frames to build core skills in layout, joinery, and finishing. Good plans also note essential tools, safety gear, and setup checks, helping you avoid errors and finish cleaner projects. Keep going, and you’ll see how to choose the best ones.
- Key Takeaways
- What Beginner Woodworking Plans Include
- Why Clear Instructions Matter
- Simple Projects That Build Core Skills
- Tools Beginner Woodworking Plans Use
- Material Lists That Save Time
- Step-by-Step Diagrams That Make Builds Easier
- How Beginner Plans Reduce Mistakes
- Best Beginner Woodworking Plans to Try
- Cutting Boards for First-Time Builders
- Picture Frames for Clean Joinery Practice
- Floating Shelves for Simple Wall Storage
- Serving Trays for Practical Skill Building
- Charging Stations for Organized Spaces
- How to Personalize Beginner Plans
- Where to Find Trusted Woodworking Plans
- Frequently Asked Questions
- Conclusion
Key Takeaways
- Step-by-step instructions make projects easy to follow from start to finish.
- Clear diagrams and accurate measurements help beginners cut and assemble correctly.
- Complete material and cut lists prevent missing supplies and reduce confusion.
- Simple projects like shelves, cutting boards, and picture frames build core skills.
- Good plans include safety tips, tool guidance, and options for personalization.
What Beginner Woodworking Plans Include
Beginner woodworking plans usually give you step-by-step instructions that walk you through the project from start to finish, so you can follow the build sequence without guessing.
You’ll also see detailed diagrams and illustrations that map each cut, joint, and assembly stage, helping you translate measurements into a physical result.
Detailed diagrams and illustrations guide each cut, joint, and assembly stage.
Most beginner woodworking plans include a complete material list, so you can gather lumber, fasteners, adhesive, and finish before you start.
They focus on achievable projects like cutting boards, picture frames, and shelves, which keep tool demands and skill requirements low.
Many plans add product and technique tips, letting you choose appropriate supplies and refine basic methods.
With beginner woodworking plans, you can work methodically and build confidence through simple, well-scoped tasks.
Why Clear Instructions Matter
Clear instructions make a woodworking plan far easier to use because they show you exactly what to do at each stage, from layout and cutting to assembly and finishing. When you follow clear instructions, you reduce ambiguity and keep your workflow controlled. You can also rely on detailed diagrams to confirm measurements and visualize the final form.
- You see the project sequence.
- You gather materials before starting.
- You verify each step against the plan.
- You avoid errors and build confidence.
Well-structured plans use clear instructions to support different skill levels, so you can learn techniques without guessing. That precision helps you complete each phase correctly, which improves results and makes future projects easier.
Simple Projects That Build Core Skills
Simple woodworking projects give you a practical way to build core skills without adding unnecessary complexity.
With easy woodworking projects like cutting boards, picture frames, coasters, and wall-mounted key holders, you can practice milling, gluing, joinery, and basic assembly in a controlled setting.
You’ll also sharpen measuring, sanding, and finishing techniques while learning to match layout accuracy to clean results.
You’ll sharpen measuring, sanding, and finishing skills while learning how precise layout leads to cleaner results.
These builds let you test fit, correct errors, and understand how each step affects the final surface and alignment.
As you repeat these methods, you reinforce core concepts and gain the confidence needed for more complex work.
Because each project stays manageable, you can focus on craftsmanship, troubleshoot mistakes, and improve steadily through hands-on experience.
Tools Beginner Woodworking Plans Use
You’ll start with essential starter tools such as a tape measure, square, sandpaper, drill, and miter saw to measure accurately, cut cleanly, and fasten parts securely.
For curved cuts or resawing, a band saw adds useful range to your beginner setup, while goggles and ear protection keep you safe around power tools.
You’ll also use precision hand tools like chisels and mallets to form joinery, build hand-eye coordination, and improve fit quality.
Essential Starter Tools
A few essential starter tools can make beginner woodworking plans far more accurate and manageable: a miter saw handles precise crosscuts and angled cuts, a band saw lets you shape intricate curves, and a router helps hollow out material or refine wood edges. You’ll get cleaner results when you pair these essential starter tools with measurement and assembly basics.
- Measuring tape, square, and level keep your layout accurate.
- Drill or impact driver speeds hole-making and screw installation.
- Goggles and masks reduce exposure to dust and debris.
- Chisels and mallets support fine joinery and detail work.
When you use each tool correctly, you’ll improve fit, alignment, and surface quality while building practical woodworking skills.
Precision Hand Tools
You’ll rely on precision hand tools like chisels, hand saws, and mallets to shape joints and edges with accuracy. A sharp chisel set lets you cut mortise and tenon joinery cleanly, which strengthens furniture frames and teaches core technique.
Coping saws and dovetail saws give you the fine control needed for tight curves, patterns, and precise joint layouts. Use a mallet to drive chisels steadily; it improves force transfer, protects the tool, and reduces errors.
When you practice with these precision hand tools, you’ll improve workmanship, build confidence, and develop the control required for more advanced woodworking projects.
Material Lists That Save Time
Detailed material lists in beginner-friendly woodworking plans cut preparation time by telling you exactly how much lumber, hardware, and finishing material you need before you start. You can verify quantities, wood species, and fastener types before you buy anything, so you won’t waste time guessing.
These material lists also give precise cut dimensions, which helps you reduce waste and measure accurately.
- Lumber quantities
- Hardware counts
- Finish requirements
- Source suggestions
With this information, you can gather supplies in one trip and avoid interruptions later. The list may also recommend suppliers, which helps you locate the right stock faster.
When you follow material lists closely, you spend less time planning and more time building with confidence.
Step-by-Step Diagrams That Make Builds Easier
You can follow clear visual build steps that show each phase of the project in sequence, so you know exactly what to do next.
These easy-to-follow assembly maps mark measurements, angles, and part placement, which helps you cut and fit components accurately.
They also lay out the order of operations, so you can work through the build efficiently and avoid preventable errors.
Clear Visual Build Steps
When a woodworking plan uses clear visual build steps, each diagram turns a complex project into a sequence of manageable actions. You can follow clear visual build steps to measure, mark, and cut with greater precision, because each illustration shows exactly where each operation belongs.
Annotations usually call out joinery, grain direction, and tool placement, so you don’t miss critical details. The structured layout also reduces errors by dividing the build into smaller tasks.
Use this process to:
- verify dimensions before cutting,
- confirm each part’s orientation,
- apply the shown technique exactly,
- check progress after each step.
As you complete each stage, you’ll build confidence and improve your skills while achieving accurate results.
Easy-to-Follow Assembly Maps
These easy-to-follow assembly maps break the project into manageable segments, so you can verify alignment, part orientation, and order of operations at each stage. The diagrams also help you picture the finished piece while you work, which reduces errors and supports accurate execution.
Whether you’re a beginner or refining your skills, you’ll gain a more controlled build process, better progress tracking, and clearer understanding of how each step contributes to the final structure.
How Beginner Plans Reduce Mistakes
Beginner woodworking plans reduce mistakes by breaking each project into clear, sequential steps that remove ambiguity from measurements, joinery, and assembly order.
You follow beginner-friendly projects with confidence because each phase narrows your choices and cuts interpretation errors. Diagrams show exact part placement, so you can verify layout before you cut.
Material lists state precise quantities, which helps you avoid overbuying lumber or missing hardware. Clear tool and technique notes explain how to execute each operation correctly, improving accuracy and reducing rework.
- Measure twice.
- Cut once.
- Match each diagram.
- Confirm every joint before glue-up.
These plans also normalize small mistakes as part of learning, so you build skill without pressure while keeping your work controlled, repeatable, and technically sound.
Best Beginner Woodworking Plans to Try
You can start with beginner woodworking plans for cutting boards, picture frames, and wall-mounted key holders because they use basic materials and simple joinery while still reinforcing accurate measuring and cutting.
These first projects give you controlled practice with core techniques, and plans with step-by-step instructions and diagrams help you execute each phase correctly.
If you want quick skill-building favorites, try coasters or rustic serving trays since they’re easy to complete, easy to personalize, and useful for building confidence.
Easy First Projects
A few simple woodworking plans can give new makers a solid foundation without overwhelming complexity. For easy first projects, you’ll want plans that specify milling steps, joinery details, material quantities, and diagrammed assembly. These beginner-friendly builds let you practice accurate cuts and clean fits while keeping risk low.
- Cutting boards: You’ll learn surfacing, squaring, and edge glue-up.
- Picture frames: You’ll practice miter joints and precise measurement.
- Wall-mounted key holders: You can finish this in a few hours with minimal stock.
- Rustic serving trays: You’ll handle basic handles, fasteners, and layout.
Because these easy first projects use few tools and limited materials, you can complete them efficiently, build confidence, and move toward more complex woodworking with stronger technique.
Skill-Building Favorites
As your skills progress, beginner woodworking plans that reinforce milling, gluing, and joinery give you the most value because they build core technique without unnecessary complexity. You can start with cutting boards, picture frames, shelves, and coasters, all strong woodworking projects for beginners.
These plans teach accurate layout, consistent dimensions, clean edges, and reliable assembly. Detailed steps and material lists help you sequence cuts, dry-fit joints, and manage glue-up time without confusion.
As you advance, move from simple boxes to small functional furniture to strengthen confidence and accuracy. Add custom engraving or other personalization only after you’ve established control over the base build.
Each project should challenge you slightly, since mistakes on beginner pieces become practical lessons that sharpen your craftsmanship.
Cutting Boards for First-Time Builders
Cutting boards make an excellent first woodworking project because they demand core skills without overwhelming complexity. You’ll mill stock, glue strips, and flatten the surface, building control with every cut on your cutting board.
- Select stable hardwoods for durability and visual contrast.
- Cut all pieces to identical width and thickness for tight glue lines.
- Clamp evenly, then sand and flatten until the face stays true.
- Add engraving or a food-safe finish to personalize the piece.
You can tailor the design with different wood species, balancing appearance and wear resistance. This project teaches measuring, precision cutting, and surface preparation while producing a practical kitchen tool.
For first-time builders, a finished cutting board proves your skills and gives you a useful, gift-ready result.
Picture Frames for Clean Joinery Practice
Building a picture frame lets you practice precise measuring, miters, and clean corner joints in a compact project with clear visual results. You’ll cut four wood strips to exact length, then join them at right angles, so every error shows up immediately.
That feedback makes the project easy to build yet demanding enough to sharpen your layout and saw control. Apply wood glue at each miter, then secure the joints with nails or screws to learn how adhesion and mechanical fastening work together.
After assembly, sand the corners until the frame feels continuous and ready for finish. You can then add stain, paint, or decorative details, which gives you controlled practice in surface preparation and customization while reinforcing core joinery skills for future projects.
Floating Shelves for Simple Wall Storage
Floating shelves give you a clean way to add wall storage without crowding the floor, and they’re a practical beginner project because the structure is simple, the materials are basic, and the result is immediately useful.
You can size floating shelves to fit your wall and match your decor with a chosen finish. Build them with accurate cuts and solid bracket placement for dependable support.
- Measure wall clearance carefully.
- Cut shelf stock square and clean.
- Secure brackets into studs.
- Sand and finish the surface.
When you install floating shelves, you practice measuring, cutting, and fastening in one compact build. Use them for plants, photos, or small decor, and you’ll create storage that also works as a focal point.
Serving Trays for Practical Skill Building
A serving tray is one of the easiest beginner woodworking projects because you only need a board, handles, and a few basic joinery steps to make it work. You’ll measure, cut, sand, and fasten serving trays with minimal tools, so you can practice core skills without complexity. Its simple geometry lets you control fit and alignment while still finishing a useful object.
| Step | Purpose |
|---|---|
| Measure and cut | Establish accurate dimensions |
| Sand edges | Improve safety and surface quality |
| Attach handles | Complete the assembly |
You can vary size, shape, and finish to test your design choices. That flexibility helps you learn fundamentals while building a functional tray you’ll actually use at home, which makes the project practical and motivating.
Charging Stations for Organized Spaces
You can build a charging station that docks multiple devices in fixed positions, keeping cords routed and surfaces clear for organized charging.
Add drawer or tray storage to separate adapters, cables, and small accessories so each item stays accessible but contained.
If you follow beginner-friendly plans with step-by-step instructions, you’ll use basic tools and materials to complete a precise, practical build.
Device Dock Organization
Charging stations give every device a designated place, keeping phones, tablets, and other electronics organized and easy to reach. You can build this beginner project with clear plans and simple joinery. A well-designed dock reduces surface clutter and keeps cords controlled, so you maintain a cleaner workspace.
Custom dimensions let you match your decor and fit tight counters or desks.
- Measure each device’s footprint accurately.
- Cut slots for stable vertical placement.
- Add cable channels for routing and access.
- Finish surfaces to match your room.
You’ll improve daily efficiency because each item returns to a fixed location, and you won’t waste time searching for chargers.
Drawer And Tray Storage
Built-in drawer and tray storage turns a charging station into a compact command center for multiple devices, keeping phones, tablets, and accessories organized without crowding counters or desks. You can place up to four devices in the open tray area, while the drawer and tray storage separates chargers, cables, and adapters into dedicated compartments.
This layout reduces tangling, speeds access, and keeps each item visible yet contained. Because you control the internal dimensions, you can tailor the station to family use or shared spaces without wasting volume. The enclosed drawer also shields accessories from dust and casual contact.
If you want a cleaner look, match the exterior finish to your room’s decor, so the station works as both a functional organizer and a precise furniture accent.
Beginner-Friendly Build Steps
A beginner-friendly charging station starts with a simple plan: cut wood planks to the exact slot widths your devices need, then assemble a stable корпус that keeps each phone or tablet upright and separated. You’ll use screws, a saw, sandpaper, and a drill to make this easy, great beginner project.
Follow these beginner-friendly build steps:
- Measure each device and mark slot spacing accurately.
- Cut side panels, base, and dividers to size.
- Assemble the корпус with predrilled screws for alignment.
- Sand edges, add finish, and install optional drawers for cords.
You’ll keep cables organized, reduce clutter, and gain practice with cutting, assembling, and finishing. Precise plans help you fit multiple gadgets securely while tailoring the design to your space.
How to Personalize Beginner Plans
Personalizing beginner woodworking plans starts with deliberate material and design choices that preserve the project’s structure while tailoring its appearance and function. You can select a distinctive wood species, then apply paint, stain, or a clear finish to control grain contrast and surface tone.
Add personal touches by engraving names, initials, or significant dates on cutting boards, picture frames, or keepsakes for sentimental value. For simple builds such as coasters or serving trays, use decorative edge treatments or stencil work to create a custom look without changing the core plan.
You can also modify dimensions to fit your decor or spacing limits. If the project needs more utility, integrate hooks, dividers, or compartments so it better supports daily use and remains beginner-friendly.
Where to Find Trusted Woodworking Plans
Where should you look first for reliable woodworking plans? Start with trusted woodworking plans from reputable woodworking websites; they usually provide step-by-step instructions, cut lists, and material schedules suited to your skill level.
To verify quality, check these sources:
To verify quality, check trusted sources with clear diagrams, accurate measurements, and helpful user feedback.
- Downloadable plan platforms with detailed diagrams.
- Community forums and woodworking groups sharing free plans and troubleshooting tips.
- Stores and suppliers like Rockler, which curate accurate project plans.
- Social media hashtags on Instagram, where makers post plans, builds, and revisions.
You’ll build faster when each plan includes dimensions, joinery notes, and clear assembly sequencing.
Compare sources, confirm measurements, and prefer plans with user feedback. This reduces errors and helps you choose trusted woodworking plans you can follow confidently.
Frequently Asked Questions
What Are Some Good Beginner Woodworking Projects?
You can start with cutting boards, picture frames, coasters, wall-mounted key holders, rustic serving trays, simple boxes, and shelves; they’re manageable, build measuring and joining skills, and let you practice finishing techniques.
What Do I Need to Start Basic Woodworking?
You’ll need a few solid basics: a miter saw or hand saw, tape measure, wood glue, clamps, safety goggles, gloves, lumber like pine or oak, and a stable workbench for precise, safe assembly.
What Are Some Woodworking Skills?
You’ll need measuring, marking, cutting, sanding, joint-making, and assembly skills. You’ll also use saws accurately, apply glue, and drive screws or nails precisely to build strong, clean, durable woodworking projects.
How to Start Woodworking With No Experience?
Start with a simple project, like a cutting board—one board, one cut, one lesson. You’ll learn basics faster, then practice safe tool use, follow precise plans, and join workshops for guidance and feedback.
Conclusion
When you choose beginner woodworking plans, you’re giving yourself a gentler path into the craft. Clear instructions, simple projects, and accurate material lists help you avoid unnecessary setbacks and keep your progress on track. As you build serving trays, charging stations, and other modest pieces, you’ll quietly sharpen core skills. With trusted plans, you can personalize each project and enjoy a smoother, more forgiving start to woodworking’s rewarding journey.