
Affiliate Disclosure: Some of the links in this post are affiliate links. This means we may earn a small commission if you make a purchase through these links—at no extra cost to you. We only recommend products and tools that we genuinely believe will help you with your woodworking projects.
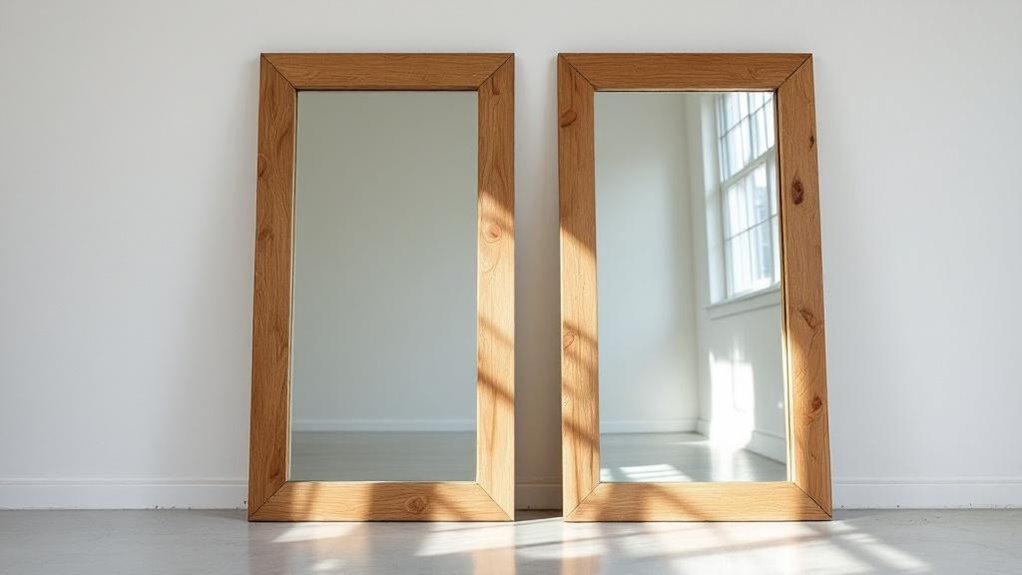
To make DIY custom wood mirrors, you’ll need a mirror, fence pickets, underlayment backing, mirror-safe adhesive, and D-rings for hanging. Measure your wall first, then cut the boards to frame your mirror cleanly. Sand, stain, and seal the wood for a rich finish, and use mirror mastic or silicone to protect the backing. Scrap wood can add texture and save money. With a few careful steps, you can create a polished piece that feels truly custom, and more.
- Key Takeaways
- What Materials Do You Need for DIY Wood Mirrors?
- How to Choose the Right Mirror Size
- Cut the Fence Picket Boards to Size
- Build the Backing Frame
- Sand and Stain the Wood
- Seal the Frame With Dark Wax
- Apply Mirror-Safe Adhesive
- Position the Mirror on the Backing
- Install the Last Frame Board
- Clamp the Mirror Overnight
- Hang Your Wood Framed Mirror Securely
- Use Safer Adhesives for Mirrors
- Save Money With Scrap Wood
- Fix Gaps and Crooked Edges
- Style and Display Your Finished Mirror
- Frequently Asked Questions
- Conclusion
Key Takeaways
- Choose a mirror size that fits your wall and furniture proportions, such as 24″x36″ or 30″x48″.
- Use fence pickets and 1/4″ underlayment to build a sturdy custom wood frame backing.
- Cut, sand, stain, and seal the wood for a smooth, finished look that matches your style.
- Attach the mirror with mirror-safe adhesive like silicone or mirror mastic, then center and level it carefully.
- Install D-ring hooks on the back for secure hanging and style the mirror with complementary decor.
What Materials Do You Need for DIY Wood Mirrors?
To build a DIY wood mirror that finishes at 23″ wide by 59″ tall, you’ll need a 12″ x 47 3/4″ mirror, three fence picket boards from Home Depot or Lowe’s, and a 4×8 sheet of 1/4″ flooring underlayment for added flexibility.
These core pieces give your DIY Wood project structure, scale, and a refined frame profile. You’ll also want clear silicone to secure the mirror, though mirror mastic offers a safer hold for the backing.
Keep D-Ring Hooks on hand so you can mount the finished piece securely. The underlayment’s extra material is handy for future accents or repairs, letting you work with intention and waste less.
With these materials, you’re set to craft a polished mirror that feels tailored, balanced, and beautifully finished.
How to Choose the Right Mirror Size
Start by measuring your wall space carefully, leaving room for the frame so the mirror feels intentional, not crowded.
Then balance the mirror’s proportions with the wall and nearby furniture—often, a piece about two-thirds the height of what it sits above creates a graceful finish.
For most rooms, choose a size that suits the scale of the space, whether that’s a refined accent or a larger statement.
Measure Wall Space
Before you buy or build your mirror, measure the wall space carefully so the size feels intentional and balanced within the room. Use a tape measure to note both width and height, then let the wall’s proportions guide your choice. A mirror that fills about two-thirds to three-quarters of the wall height often reads beautifully composed, while smaller pieces can add a refined accent in cozier corners.
- Check the wall’s dimensions first.
- Match scale to the room’s purpose.
- Test placement near furniture.
Keep the mirror at a height where it reflects clearly without crowding the space. Standard sizes like 24″x36″ or 30″x48″ offer a graceful starting point, but custom dimensions can elevate an irregular wall or personal design vision.
Balance Frame Proportions
A well-proportioned mirror can feel like a deliberate piece of architecture, so size it with both the wall and the room’s furnishings in mind.
To balance frame proportions, aim for a mirror that fills about two-thirds to three-quarters of the wall height, leaving enough breathing room for a refined, intentional look. If you’re choosing a wider format, let its span complement a bench, dresser, or console so it feels integrated, not intrusive.
A width-to-height ratio around 1:3 or 1:4 keeps the silhouette elegant and visually poised. Before you commit, confirm the final dimensions—say, 23″ wide by 59″ tall—so the piece fits cleanly and preserves the curated harmony you’re after.
Match Room Scale
Once you’ve balanced the frame proportions, the next step is matching the mirror to the room’s scale so it feels naturally placed. To match room scale, start by measuring the wall and nearby furniture, then choose a size that feels intentional, not improvised.
- In open rooms, lean into larger mirrors to create a focal point and amplify spaciousness.
- Above sofas, mantels, or buffets, aim for a mirror about two-thirds the furniture height for a refined proportion.
- In narrow entryways, choose a tall, vertical shape to elongate the space with quiet elegance.
Let the frame style echo your décor so the piece feels curated, not crowded.
A well-sized mirror should settle into the room gracefully, reflecting light, balance, and a sense of design that belongs.
Cut the Fence Picket Boards to Size
Lay out your fence picket boards against the mirror’s final dimensions, then measure and mark each piece with care so every cut lands exactly where it should.
To cut the fence picket boards to size, follow those marks with a miter saw or hand saw for crisp, straight edges that keep the frame elegant. Shape three boards into the rectangular outline, making the top and bottom pieces longer than the side pieces.
As you cut, pay attention to grain and pattern so the wood reads as one refined composition. Afterward, sand each edge lightly to erase rough spots and splinters, leaving a smooth surface ready for a graceful finish.
This careful trimming sets the tone for the mirror’s polished, custom character.
Build the Backing Frame
Cut your 1/4-inch underlayment to the mirror’s exact dimensions, then set it aside as a crisp, supportive backer.
Next, join the three trimmed fence pickets at the corners with wood glue and screws, keeping the frame tight and true.
Check that it’s square and level before you move on, so the mirror sits on a solid, refined foundation.
Cutting Backer Board
With your measurements marked, you can cut the backer board to 23″ wide by 59″ tall so it fits the mirror’s final dimensions and gives it full support.
For cutting backer board, use a circular saw or table saw to make crisp, straight edges from a 4×8 sheet of flooring underlayment. Measure twice, cut once, and keep the blade steady to reduce waste and keep the silhouette refined.
Wear safety goggles and a dust mask so you stay protected while you work. If you choose furniture backer board instead, check that its thickness suits your mirror’s assembly.
Afterward, lightly sand any rough edges for a smoother finish.
- Clean cuts elevate the frame.
- Proper sizing preserves balance.
- A finished edge feels intentional.
Securing Frame Pieces
Now that the backer board is trimmed to size, you can build the backing frame that gives the mirror its strength and shape.
Cut three fence picket boards with precision so they fit snugly around the 23″ x 59″ mirror, then begin securing frame pieces in a clean, balanced layout.
Align each edge carefully, keeping the silhouette crisp and exact.
Apply clear silicone or mirror mastic to the frame, then set the mirror gently in place without disturbing its backing.
Press evenly so the adhesive bonds well.
Once the frame’s assembled, install D-Ring Hooks on the back, spaced for stable weight distribution.
Leave the piece overnight to cure fully.
This careful finish elevates your DIY Home Decor with a refined, custom feel.
Sand and Stain the Wood
Begin by sanding the wood pickets with progressively finer grits, starting at 80-grit and working up to 220-grit, until the surface feels smooth and free of splinters.
This is where you sand and stain the wood with intention, shaping a finish that feels tailored and timeless.
- Choose a stain that suits your decor, like dark walnut or espresso.
- Brush or wipe it on with the grain for an even, elegant tone.
- Wipe away any excess after a few minutes, then let it dry fully, usually about 24 hours.
Once the color settles, your mirror frame will look richer, more refined, and ready for its next beautiful layer.
Seal the Frame With Dark Wax
Once the stain is completely dry, you can seal the frame with dark wax to deepen the rustic finish and protect the wood.
Use a soft cloth to work in small sections, so you can seal the frame with control and preserve its handcrafted character. As you buff the wax, you’ll bring out the grain’s quiet movement and add a richer, more dimensional glow.
Use a soft cloth in small sections to preserve the frame’s handcrafted character and reveal the wood’s quiet, dimensional glow.
Keep your pressure light and even to create a smooth sheen that feels refined, not heavy. This finish also forms a subtle barrier against moisture and everyday wear, helping the wood age beautifully.
Take your time, polish each edge, and let the frame reveal a warm, curated presence that elevates the mirror’s entire aesthetic.
Apply Mirror-Safe Adhesive
Reach for a mirror-safe adhesive—either mirror mastic or a silicone made specifically for mirrors—and apply it to the back in a zigzag pattern so the bond stays secure without harming the reflective backing. Choose this mirror-safe adhesive with intention; regular silicone can slowly dull the finish.
Keep the lines even and graceful, so you get full coverage without trapping air that could weaken the hold or invite sagging later.
- Use a clean, dust-free surface for stronger adhesion.
- Follow the manufacturer’s cure time, usually 24 hours.
- Avoid adding weight or pressure until the adhesive sets completely.
Let the adhesive cure undisturbed, and you’ll preserve the mirror’s elegant sheen while creating a lasting bond.
Position the Mirror on the Backing
Now you’ll center the mirror on the backing, letting its edges sit in quiet symmetry within the frame.
Check the alignment from side to side, then make any small adjustments before you press it into place.
With the silicone still workable, secure it evenly and let the bond set into a clean, lasting hold.
Center Mirror Placement
First, center the mirror on the backing by measuring equal distances from each edge, then lightly mark its position so you have a precise guide. This center mirror placement step gives your piece balance and a refined, gallery-worthy presence.
Use a level to confirm the mirror sits straight before you commit to adhesive, keeping the look clean and deliberate.
- Measure twice for symmetry.
- Trace faint corner guides.
- Prep adhesive with intention.
Next, spread clear silicone or mirror mastic evenly where the mirror will rest, creating a strong, graceful bond. Then press the mirror into place with care, adjusting gently as needed before it sets.
Your attention here shapes the finish, turning simple materials into a polished custom accent.
Check Edge Alignment
With the mirror centered, place it on the backing and check that each edge sits evenly all the way around for a clean, professional finish. You’ll want to check edge alignment from every angle, then use a level to confirm the mirror lies perfectly straight.
A slight tilt can disrupt both the look and the function of your piece, so trust your eye and your tools. Aim for an equal gap along all sides; that balanced border helps the finished frame feel intentional and refined.
If you need a touch more control, slip in small spacers to preserve the spacing. Before moving on, double-check the position several times. That careful pause helps you avoid costly mistakes and keeps your design polished and precise.
Secure With Silicone
Apply a generous bead of clear silicone along the back edges of the mirror, then set it carefully onto the backing so it lands centered and secure. Press lightly, and use a level to confirm the face stays straight before the adhesive begins to grab.
When you secure with silicone, work with calm precision; it sets fast, so small adjustments matter.
- Center the mirror visually, then verify the margins match on every side.
- Smooth any shift immediately, keeping the surface flush and elegant.
- Let the piece cure overnight, or at least 24 hours, for a lasting hold.
If you prefer extra protection, mirror mastic offers safer adhesion for delicate backing.
Install the Last Frame Board
Set the last frame board into place only after you’re sure the mirror is tightly secured and sitting evenly within the frame. To install the last frame board, brush wood glue on the ends, then guide the piece in so every edge sits snug and true. Press it gently, preserving the clean geometry of your design.
| Step | Focus | Result |
|---|---|---|
| Position | Align the board | Seamless fit |
| Bond | Add adhesive | Stronger hold |
| Inspect | Check gaps | Refined finish |
If anything looks off, adjust it before the adhesive begins to grab. A careful fit keeps the frame graceful and structurally sound. Let the glue set exactly as directed by the manufacturer, so the mirror stays stable and the composition feels complete.
Clamp the Mirror Overnight
Once the mirror is seated, add clear silicone or mirror mastic around the opening and press the glass into place. Then distribute steady weight across the surface so it cures evenly within the frame.
- Use smooth, even pressure so the bond settles cleanly.
- If you’re working with untreated wood, keep the clamping gentle to avoid heat engineering issues that can stress the glass.
- Clamp the mirror overnight, letting the adhesive set into a firm, lasting hold.
Hang Your Wood Framed Mirror Securely
Set D-ring hooks on the back of your wood framed mirror about one-third down from the top so the weight rests with poise and balance.
Match those hooks with wall anchors suited to your wall, and add toggle bolts or heavy-duty screws if the mirror feels substantial.
Once it’s up, check that it hangs level and make small adjustments until it sits just right.
Secure D-Ring Placement
Mount D-ring hooks on the back of your wood-framed mirror so it hangs securely and stays stable on the wall. Place the D-Ring Hooks about one-third down from the top edge for a refined, balanced line. Before you drive in screws, pre-drill each spot to protect the wood and keep the finish clean.
Use a level to check your layout, then secure the hooks with confidence and care.
- Mark both hook points evenly.
- Pre-drill to prevent splitting.
- Verify the mirror hangs straight.
When you’re ready, set the mirror on a stud or sturdy wall anchor. This subtle placement supports the frame beautifully and helps your custom piece feel intentional, polished, and enduring.
Balanced Wall Support
As you hang your wood-framed mirror, balance the load with care by using evenly placed D-ring hooks and wall hardware rated for at least twice the mirror’s weight. Center each hook at the same height, then mount into wall studs whenever you can for balanced wall support and a cleaner, steadier finish.
If studs aren’t available, choose anchors or screws that still exceed the mirror’s load. Before you let go, press the mirror evenly so any adhesive bonds cure without strain.
Check that the surface sits level, with no tilt or pull. After hanging, revisit it occasionally; tighten hardware or replace anchors at the first sign of shift, and keep the piece poised, secure, and graceful on your wall.
Use Safer Adhesives for Mirrors
Choose mirror mastic instead of standard silicone when you attach the glass, since it’s formulated to bond securely without harming the mirror backing. With safe adhesives, you protect the reflective layer and keep your piece looking pristine.
Apply the mastic in an even sweep across the back, so the mirror settles smoothly without gaps or ripples.
- Use mirror mastic for a secure, gentle bond.
- Press the mirror under even pressure overnight.
- Add D-Ring Hooks for extra stability on heavier pieces.
Clear silicone can look convenient, but it may react with the backing over time and weaken the hold.
Let the assembly rest undisturbed, and you’ll get a durable, elegant finish that feels intentional, refined, and built to last.
Save Money With Scrap Wood
A few well-chosen scraps can trim your project cost dramatically, since leftover wood from furniture restoration shops, construction sites, or local classifieds is often free or priced far below new lumber.
When you build your mirror frame with scrap wood, you keep your budget light without sacrificing character. Browse community groups and social feeds for discarded boards, then choose pieces with appealing grain, patina, or subtle color shifts.
You can mix different woods for a layered, bespoke look that feels collected rather than purchased. This approach also reduces waste, making your project feel more thoughtful and sustainable.
With a little patience, you’ll turn overlooked offcuts into a refined frame that looks intentional, elevated, and distinctly yours.
Fix Gaps and Crooked Edges
Even careful cuts can leave small gaps or a slightly crooked edge, but you can refine the frame as you go.
To fix gaps, press wood filler into any seams, let it dry, then sand it smooth for a seamless finish. If boards don’t meet cleanly, trim the edges with a miter saw or hand saw so they sit flush.
During assembly, clamp each piece tightly while the adhesive sets, and keep checking with a level so you catch shifts before they harden.
- Use steady pressure for cleaner joints.
- Recheck alignment before glue cures.
- Add router-cleaned edges or trim if flaws remain.
Style and Display Your Finished Mirror
Your finished mirror can do more than reflect light—it can become a focal point that brings warmth and texture to an entryway or bedroom.
To style and display your finished mirror, hang it at eye level so it reflects beautifully and greets you with a welcoming feel. Pair its rustic wood frame with nearby wood accents, like a bench, tray, or side table, to create a cohesive, curated look.
Hang it at eye level and pair rustic wood accents for a warm, cohesive, welcoming display.
Beneath it, add slim shelving or decorative hooks for plants, candles, or framed photos, blending beauty with function. Then, soften the scene with wall sconces or a floor lamp, letting light skim the grain and highlight the mirror’s character.
With these thoughtful touches, your custom piece will feel polished, personal, and effortlessly placed.
Frequently Asked Questions
How Long Does a DIY Wood Mirror Project Usually Take?
You’ll usually spend 3 to 6 hours on a DIY wood mirror, depending on your tools, drying time, and design. If you’re careful and curated, you can finish it beautifully in an afternoon.
What Tools Are Essential for Beginners Making Wood Mirrors?
You’ll need a saw, measuring tape, square, sandpaper, clamps, wood glue, and a drill. With these, you can cut cleanly, join tightly, and finish beautifully—your mirror’s frame won’t merely exist; it’ll shine.
Can I Use Reclaimed Wood for a Custom Mirror Frame?
Yes, you can use reclaimed wood for a custom mirror frame, and you’ll add rich character fast. Just inspect for rot, nails, and warping, then sand, seal, and finish it beautifully.
How Do I Clean and Maintain a Wood-Framed Mirror?
You’ll dust the frame gently, wipe it with a barely damp cloth, then dry it immediately. Avoid harsh cleaners, excess moisture, and direct sunlight. You can refresh the wood occasionally with a suitable conditioner.
What Mistakes Should I Avoid When Making a Mirror Frame?
Avoid measuring loosely, rushing cuts, choosing warped wood, and skipping dry fits. You’ll want to seal edges, leave expansion room, and secure the mirror gently. Don’t overdecorate; let clean lines and balanced proportions shine.
Conclusion
When you finish your DIY wood mirror, step back and let the grain, stain, and glass speak for you. You’ve turned simple scraps into a polished piece that feels warm, custom, and timeless. Even a crooked edge can become part of the charm when you refine it with care. Like a golden hour portrait in a modern loft, your mirror reflects more than your image—it reflects your taste, patience, and craftsmanship.